
Why Every Dog Owner Needs a First Aid Kit
Accidents happen without warning. Whether your dog cuts a paw on a walk, swallows something suspicious, or has a sudden allergic reaction, having a first aid kit prepared means you can act quickly and calmly. A good kit does not replace veterinary care — it buys you precious time while you seek professional help. This guide walks you through every item you need, how to use each one, and the situations where you must call your vet immediately rather than treating at home.
Essential Items for a Dog First Aid Kit
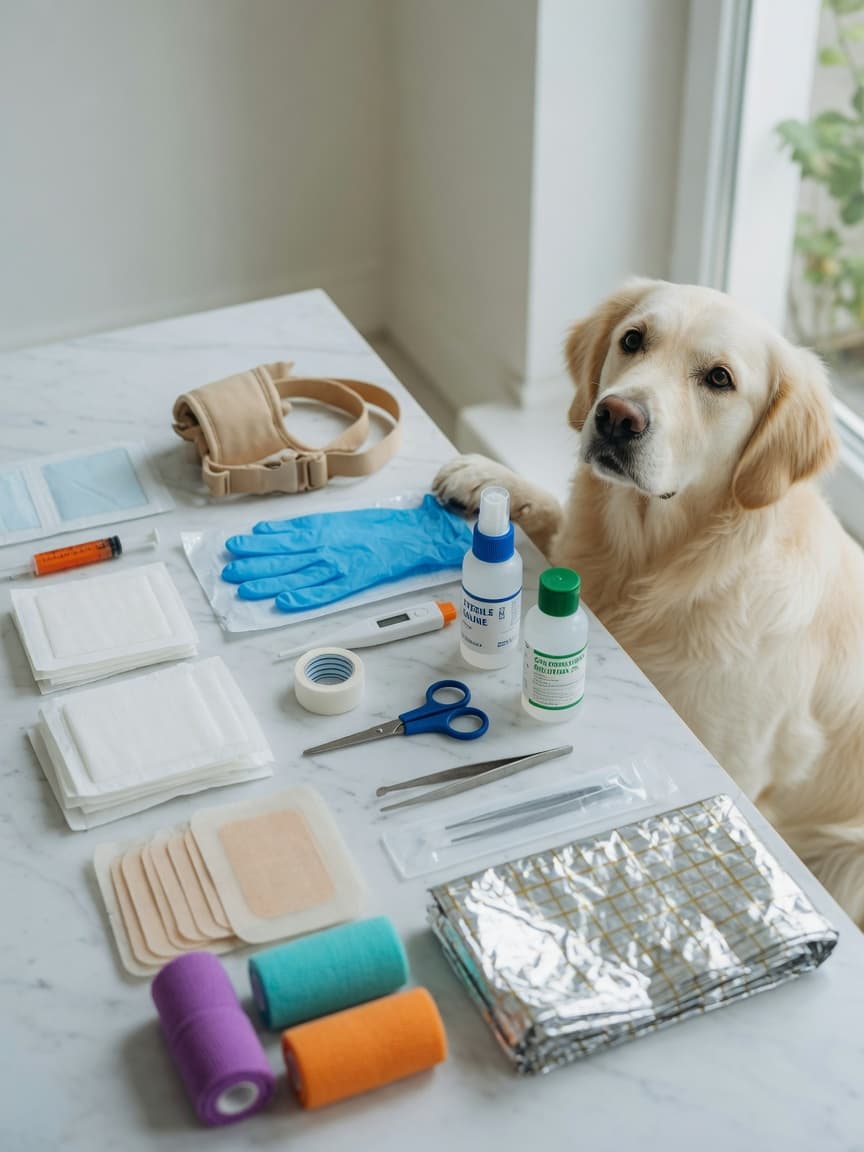
Your kit should be stored in a clearly labelled, waterproof container that is easy to grab in a hurry. Keep one at home and a smaller version in your car or dog bag for outdoor adventures. Below is a comprehensive list of what to include, all of which are widely available across the EU, including through online pet retailers such as Zooplus.
Wound Care Supplies
- Sterile saline solution — for flushing wounds and eyes. Avoid tap water where possible, as it can introduce bacteria.
- Antiseptic wipes or solution — chlorhexidine-based products are safe for dogs and widely available. Avoid alcohol-based wipes, which can damage tissue.
- Sterile gauze pads and rolls — for covering wounds, absorbing blood, and padding bandages.
- Non-adhesive wound dressings — these sit directly on the wound without sticking to raw tissue, making removal far less painful.
- Self-adhesive bandages (cohesive bandage) — brands such as VetFlex or similar cohesive wraps sold on Zooplus stick to themselves without adhering to fur. Ideal for securing dressings on paws and limbs.
- Medical tape — for securing gauze where cohesive bandage is not appropriate.
Tools and Equipment
- Blunt-ended scissors — for cutting bandages and trimming fur around wounds safely.
- Tweezers or tick remover tool — for removing splinters or ticks. Always use a proper tick tool; never twist or squeeze.
- Digital thermometer — a dog's normal temperature is 38–39°C. Readings above 39.5°C or below 37.5°C require veterinary attention.
- Disposable gloves — protect both you and your dog from cross-contamination.
- Muzzle or bandage strip — even the gentlest dog may bite when in pain. A soft muzzle is essential for safe handling of an injured animal.
- Sterile eye wash — single-use pods are the most hygienic option for flushing eyes after contact with chemicals or irritants.
- Foil emergency blanket — helps prevent shock by retaining body heat.
- Oral syringe — for administering liquid medications if advised by your vet.
Medications to Include (With Vet Guidance)
- Activated charcoal — only ever give this under direct instruction from your vet or a poisons helpline, as it is not appropriate for all types of poisoning.
- Antihistamine tablets — cetirizine (at appropriate dosing) may be used for mild allergic reactions, but always confirm the correct dose for your dog's weight with your vet in advance.
- Hydrogen peroxide (3%) — some vets recommend keeping this on hand for inducing vomiting in poisoning cases, but it must never be used without explicit vet instruction.
How to Clean and Bandage a Wound
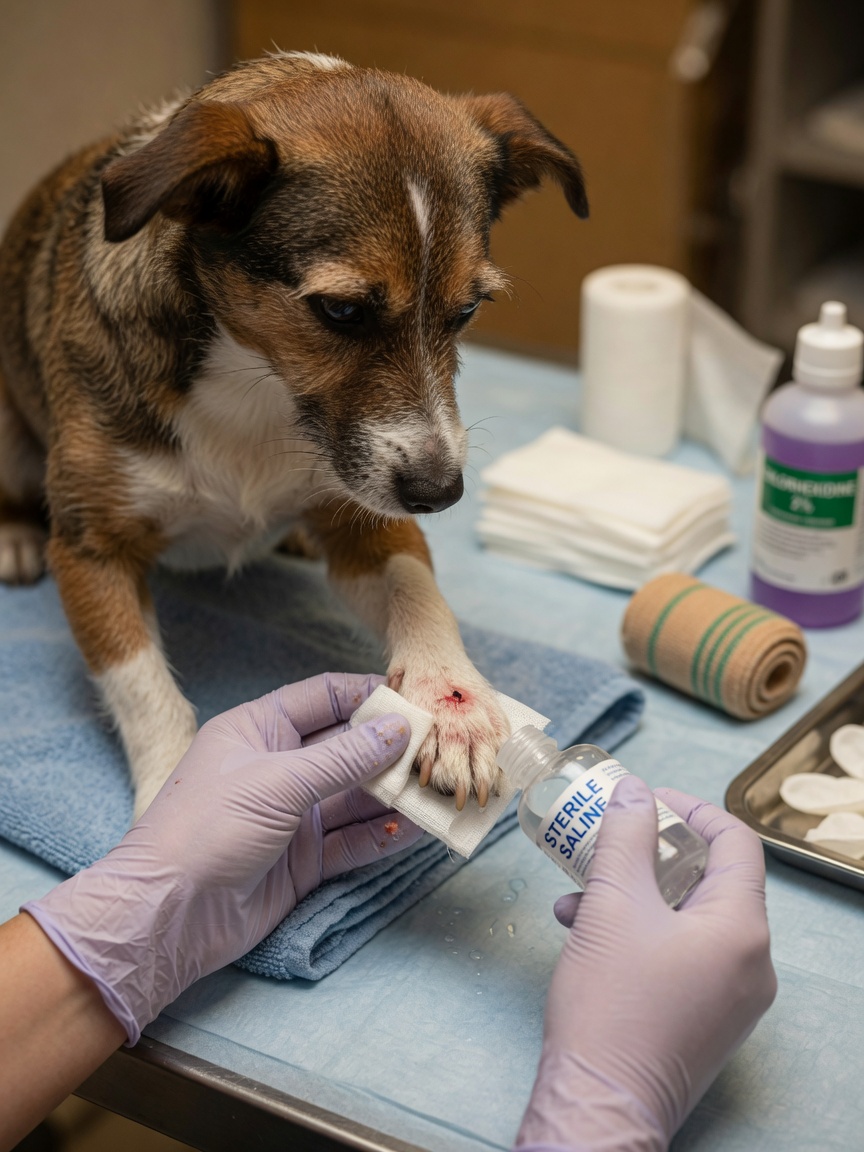
Minor cuts and grazes are among the most common injuries dogs sustain. Follow these steps to manage them safely until you can visit your vet.
- Put on your disposable gloves before touching the wound.
- Gently flush the wound with sterile saline solution to remove debris.
- Pat dry with a clean gauze pad — do not rub, as this disturbs any clotting.
- Apply a small amount of chlorhexidine solution to the area using a fresh gauze pad.
- Place a non-adhesive dressing directly over the wound.
- Secure with a gauze roll, then wrap with cohesive bandage. Apply with gentle, even pressure — you should be able to slip two fingers under the finished bandage. Too tight can restrict circulation.
- Check the bandage every few hours for swelling, discharge, or odour.
Change the dressing at least once daily or whenever it becomes wet or soiled. Any wound deeper than a surface graze, or one that will not stop bleeding after five minutes of firm pressure, requires a vet visit the same day.
When to Call Your Vet Immediately
First aid is a bridge, not a solution. The following situations are emergencies — do not attempt to manage these at home. Call your vet immediately or go directly to an emergency clinic.
- Bleeding that does not stop after five minutes of direct pressure
- Suspected poisoning or ingestion of a toxic substance
- Difficulty breathing, choking, or pale or blue gums
- Collapse, loss of consciousness, or seizures
- Suspected broken bones or inability to bear weight
- Eye injuries or sudden loss of vision
- Suspected heatstroke (excessive panting, drooling, and disorientation in hot conditions)
- Deep lacerations, puncture wounds, or bites from other animals
- Signs of severe allergic reaction: swelling of the face, difficulty swallowing, or sudden extreme lethargy
If you are ever unsure, always call your vet. It is far better to make an unnecessary call than to delay treatment when it matters most.
Storing Your Kit Properly
A first aid kit is only useful if you can access it quickly and trust that its contents are still in date. Store it in a cool, dry place away from direct sunlight, as heat can degrade sterile products. Check expiry dates every six months and replace anything that has been used. Label the outside of the container clearly with the word "First Aid" and your vet's emergency number written in large print on the lid. If you walk your dog regularly in remote areas, consider keeping a compact version of the kit in your backpack. Zooplus stocks a good selection of canine first aid supplies, including cohesive bandages, chlorhexidine solutions, and tick removal tools, making it straightforward to restock from one place.
Final Thoughts
Building a dog first aid kit takes less than an hour and costs relatively little, but it can make a significant difference in an emergency. Familiarise yourself with each item before you need it — practise bandaging on a willing (and healthy) dog so the technique feels natural under pressure. Most importantly, remember that first aid is always temporary. Even when your dog seems fine after a minor incident, a follow-up call to your vet is always a sensible precaution.